Follow the instructions below to create an effective automation sequence.
Go to the Actions Left Menu.
Select Automations.
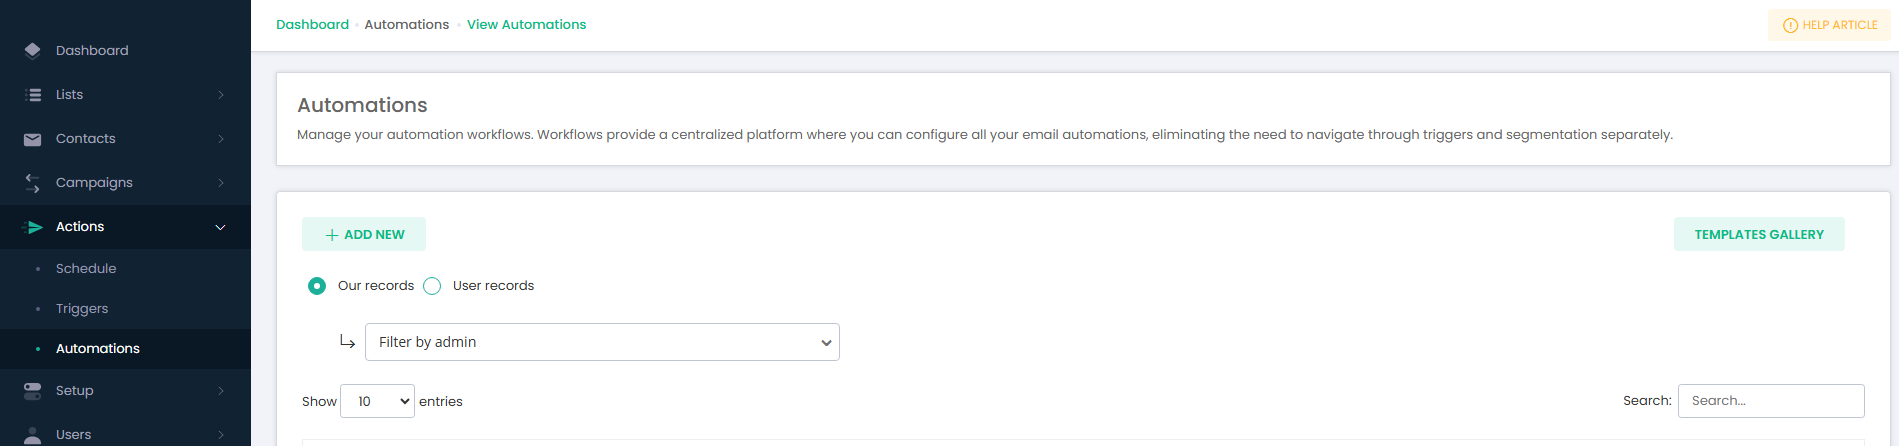
Click on the [+Add New] button.
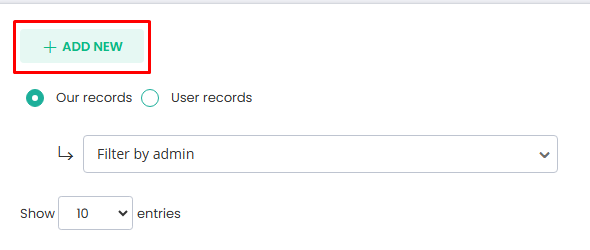
A pop-up will appear. Enter a suitable name for your automation in the Automation Name field e.g. Welcome Email for new Subscribers.
Hit Confirm to proceed.
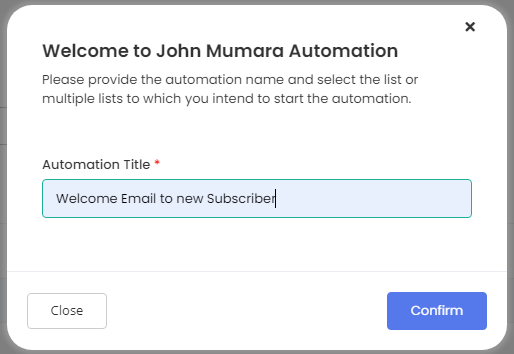
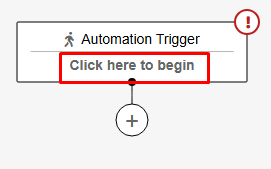
You will be directed to the automation setup page.
Click on “Click Here to Begin” to continue configuring your automation.
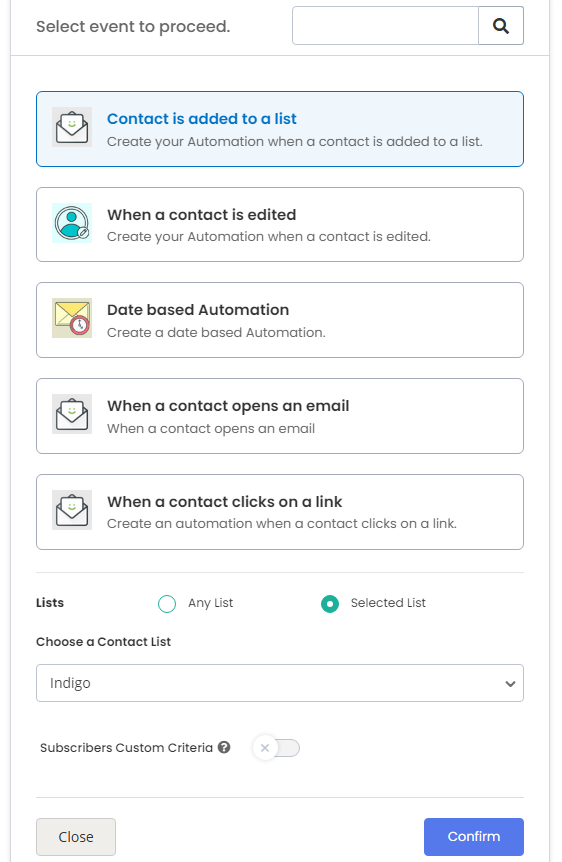
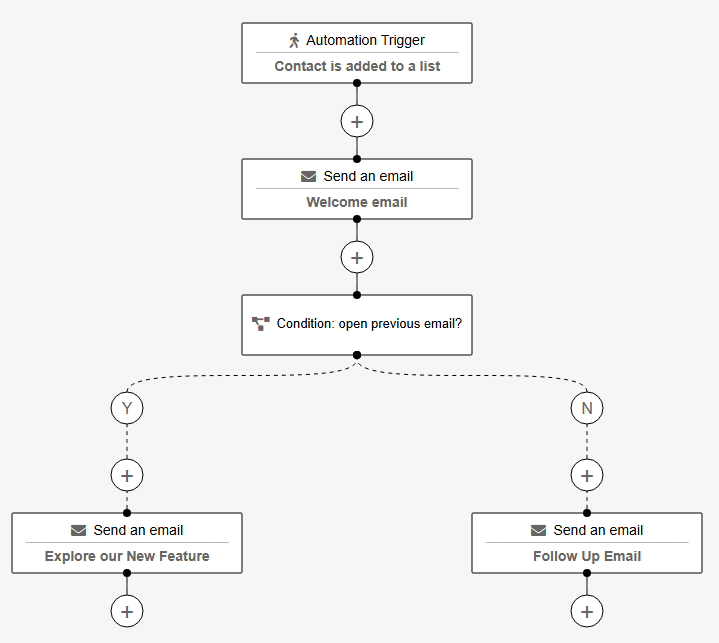
Select “Contact is Added to a List” event from the event list, then select the contact list “Indigo” from the list drop-down. Automation actions will be fired when the contact is added to the list.
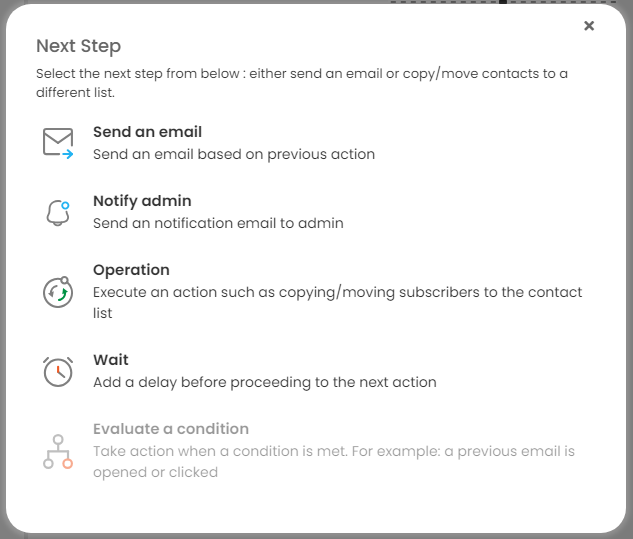
After that, click on the Plus (+) button.
A menu will appear with multiple actions. Choose Send an Email to send the welcome email.
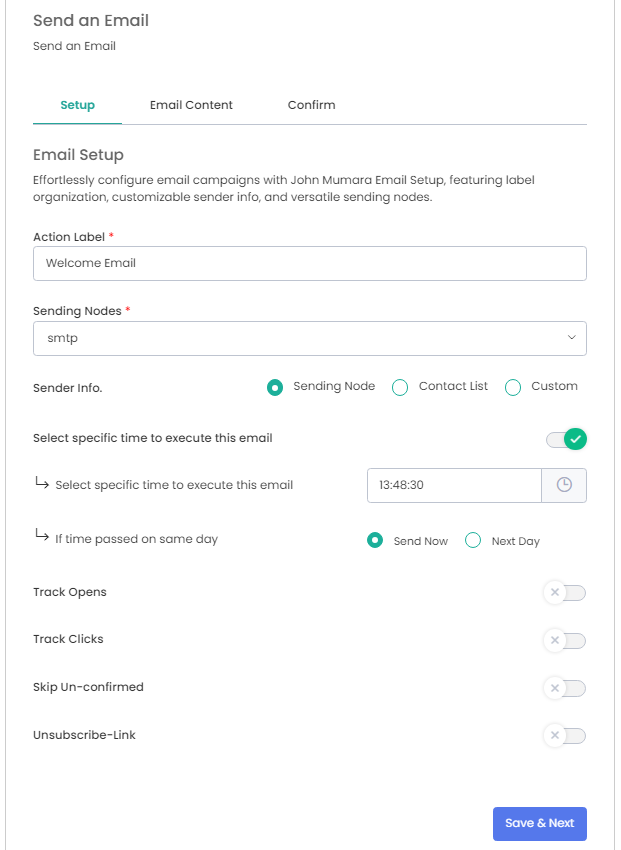
The Email Setup Page will appear, consisting of three steps:
Setup
Email Content
Confirm
Email Setup Details
Action Label: Enter the desired title for your automation.
Sending Nodes: Select your sending node (e.g., SMTP, Amazon, etc).
Select specific time to execute this email: Email will be sent at the specific selected time.
If time passed on same day:
Send Now: Email will be sent immediately.
Next Day: Email will be sent at the same time the next day.
Track Opens: Monitor where your emails are opened.
Track Clicks: Track link clicks in your email.
Skip Unconfirmed: Exclude unconfirmed subscribers.
Subscriber Link: Enable or disable the unsubscribe link.
After configuring the options, click Save and Next.
Create Email Content:
For the Email Content, choose to use an existing broadcast or create a new one by selecting Design New.
Click Save and Next to continue.

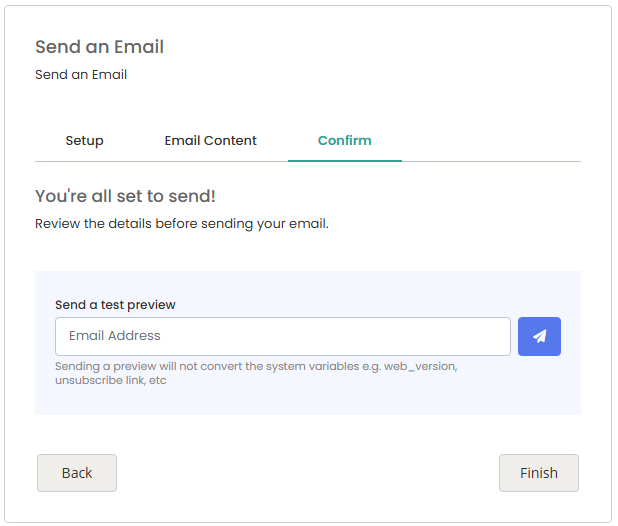
Confirm Email Setup
Send a test preview to review the Broadcast details in the Confirm Email step.
Click Finish to complete this section of the automation setup.
Click on the Plus (+) button again to add more actions to your automation.
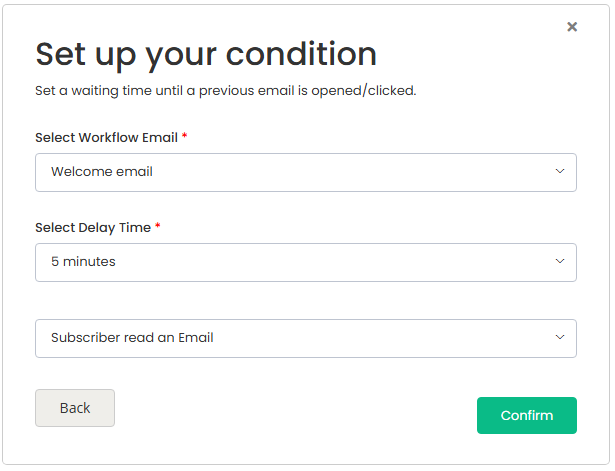
Select Evaluate Your Email to configure responses based on subscriber engagement.
Scenarios:
Select the Workflow Email Name.
Define a Delay Time before evaluating engagement.
Choose conditions based on whether the subscriber has opened or clicked the email:
Opened the Email: Follow up with an email discussing new or upcoming features.
Did Not Open the Email: Send a follow-up email to encourage engagement.
Ensure that the Status is enabled to activate the automation.

Note: To set up additional events, you may need to deactivate the automation status temporarily.
Then click the Finish button to get the Automation done.