Mumara Campaigns helps you keep in touch with your leads easily by automatically following up with them. As soon as someone shows interest in your brand, Mumara lets you guide them through the whole journey—from the first contact to becoming a customer—without needing to do it all manually.
You can set up a drip campaign, which is a series of messages sent automatically on a schedule. Mumara makes this simple with an easy-to-use interface and clear steps to manage your campaign.
Navigate to the Campaigns (Drip Campaigns) section.
Click on [+ Add New group] to initiate the process.
Fields
Field | Type | Details |
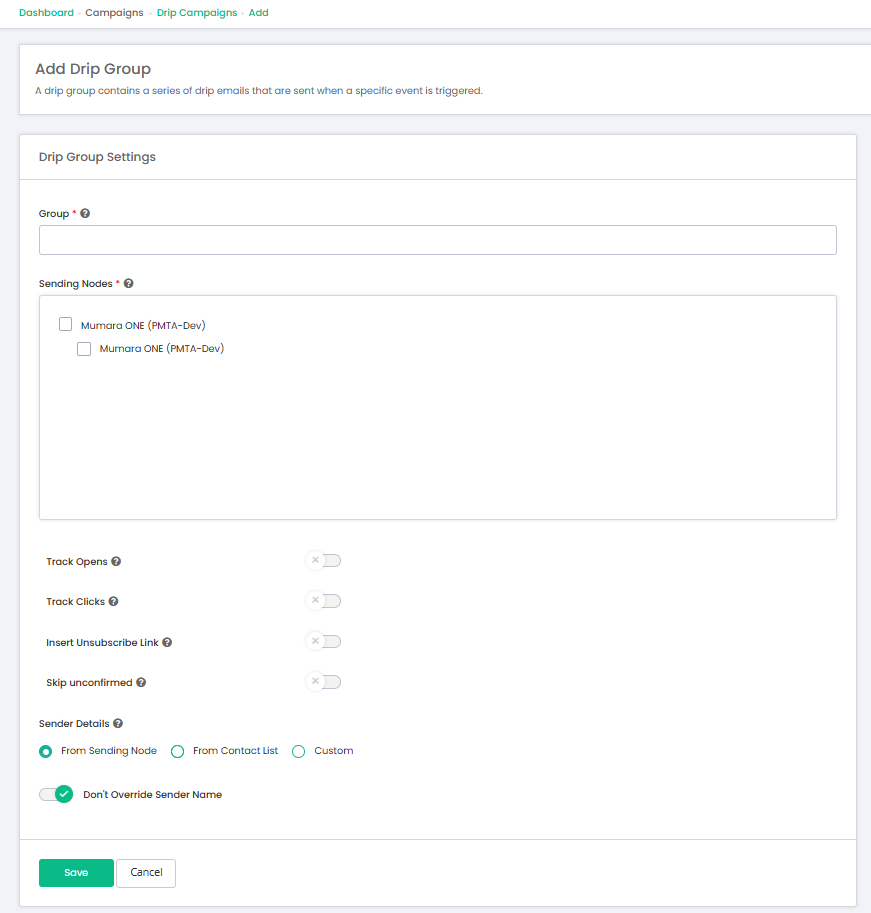
Group * | Text | Add group name. |
Sending Nodes * | Check box | Choose the sending nodes that will send the drips. If you select more than one, they will take turns sending (Required). |
Track Opens | Toggle button | Enable tracking for when recipients open your drip emails. |
Track Clicks | Toggle button | Enable tracking for when recipients click on links in your drip emails. |
Insert Unsubscribe Link | Toggle button | automatically embeds an unsubscribe link at the end of the drip email. |
Skip unconfirmed | Toggle button |
|
Sender Details | Toggle button |
|
Don't Override Sender Name | Radio button |
|
Save | Button | To save all the entered information. |
Cancel | Button | to cancel all entries & go to the back button. |

1. Navigate to the Campaigns (Drip Campaigns) section.
2. Click on [+ Add New Drip] to initiate the process.
There are two ways to add a Drip.
Click on the [+ Add a Drip] button.
Click on Drip Count and then click on the [+ Add a Drip] button (on the View Drips page).
There are three sub-TABs on the add drip campaigns.
Drip Details
Interval
Email Content
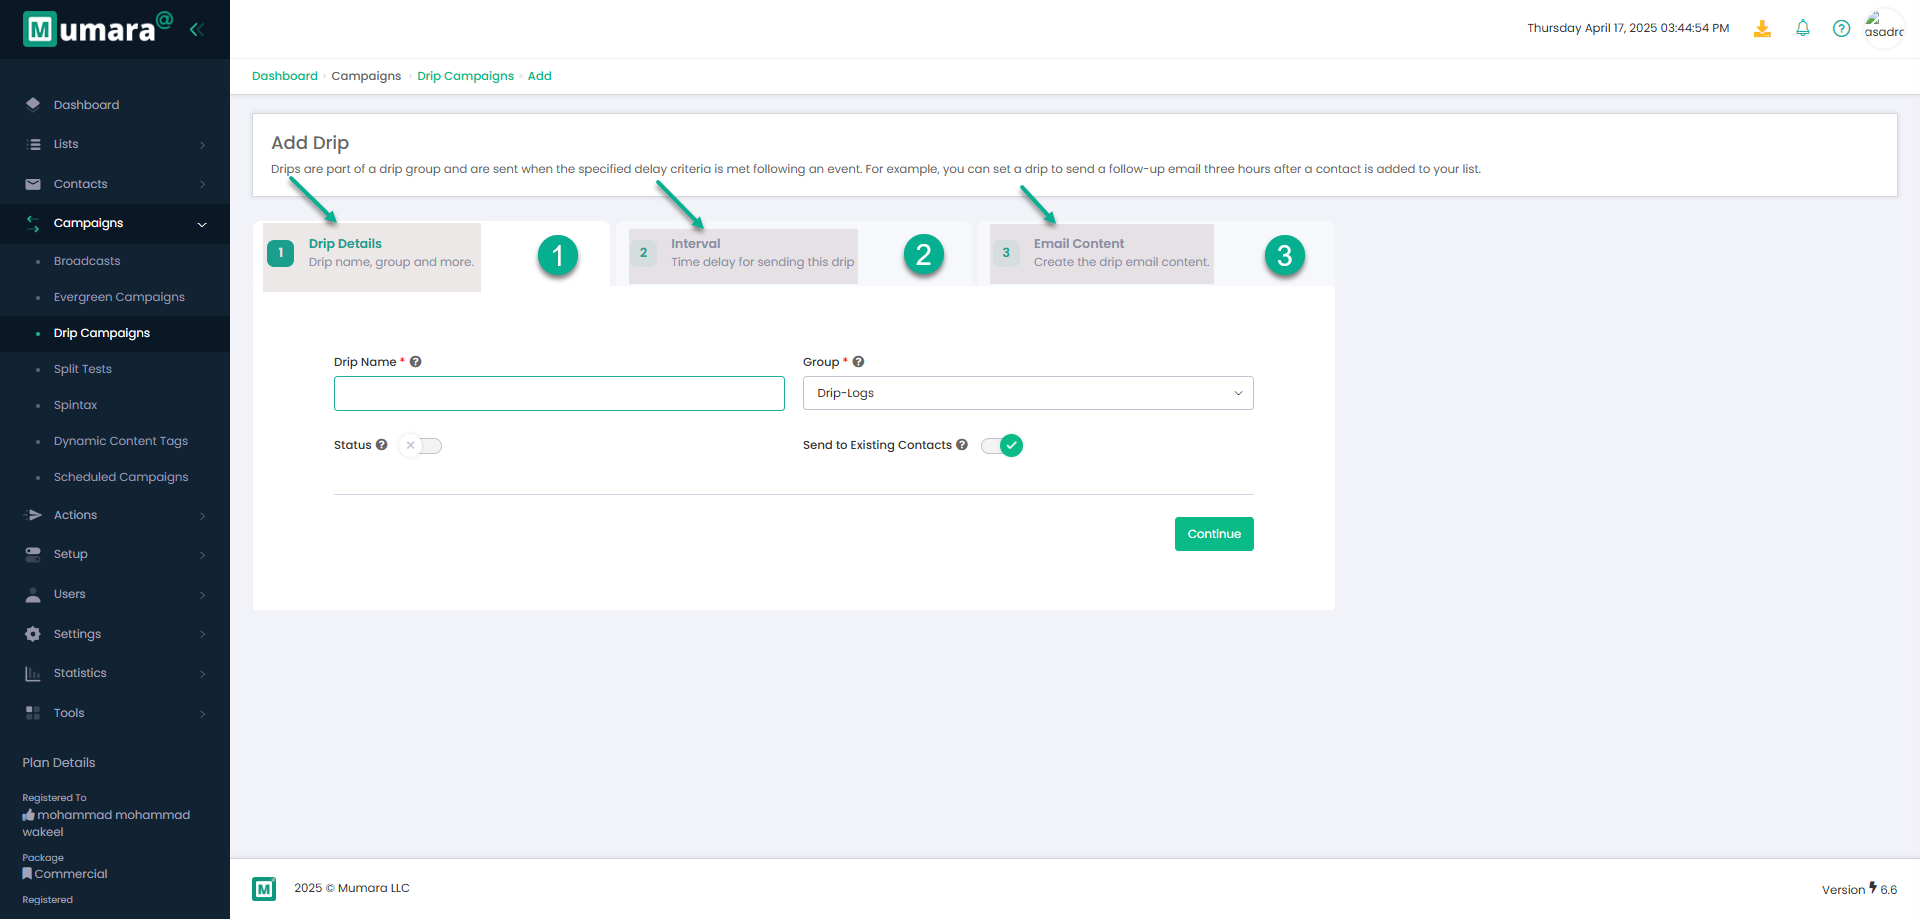
In this TAB, the user required to enter the basic details of the Drip campaigns.
Follow each step in the flow sequentially to successfully add Drip campaign.
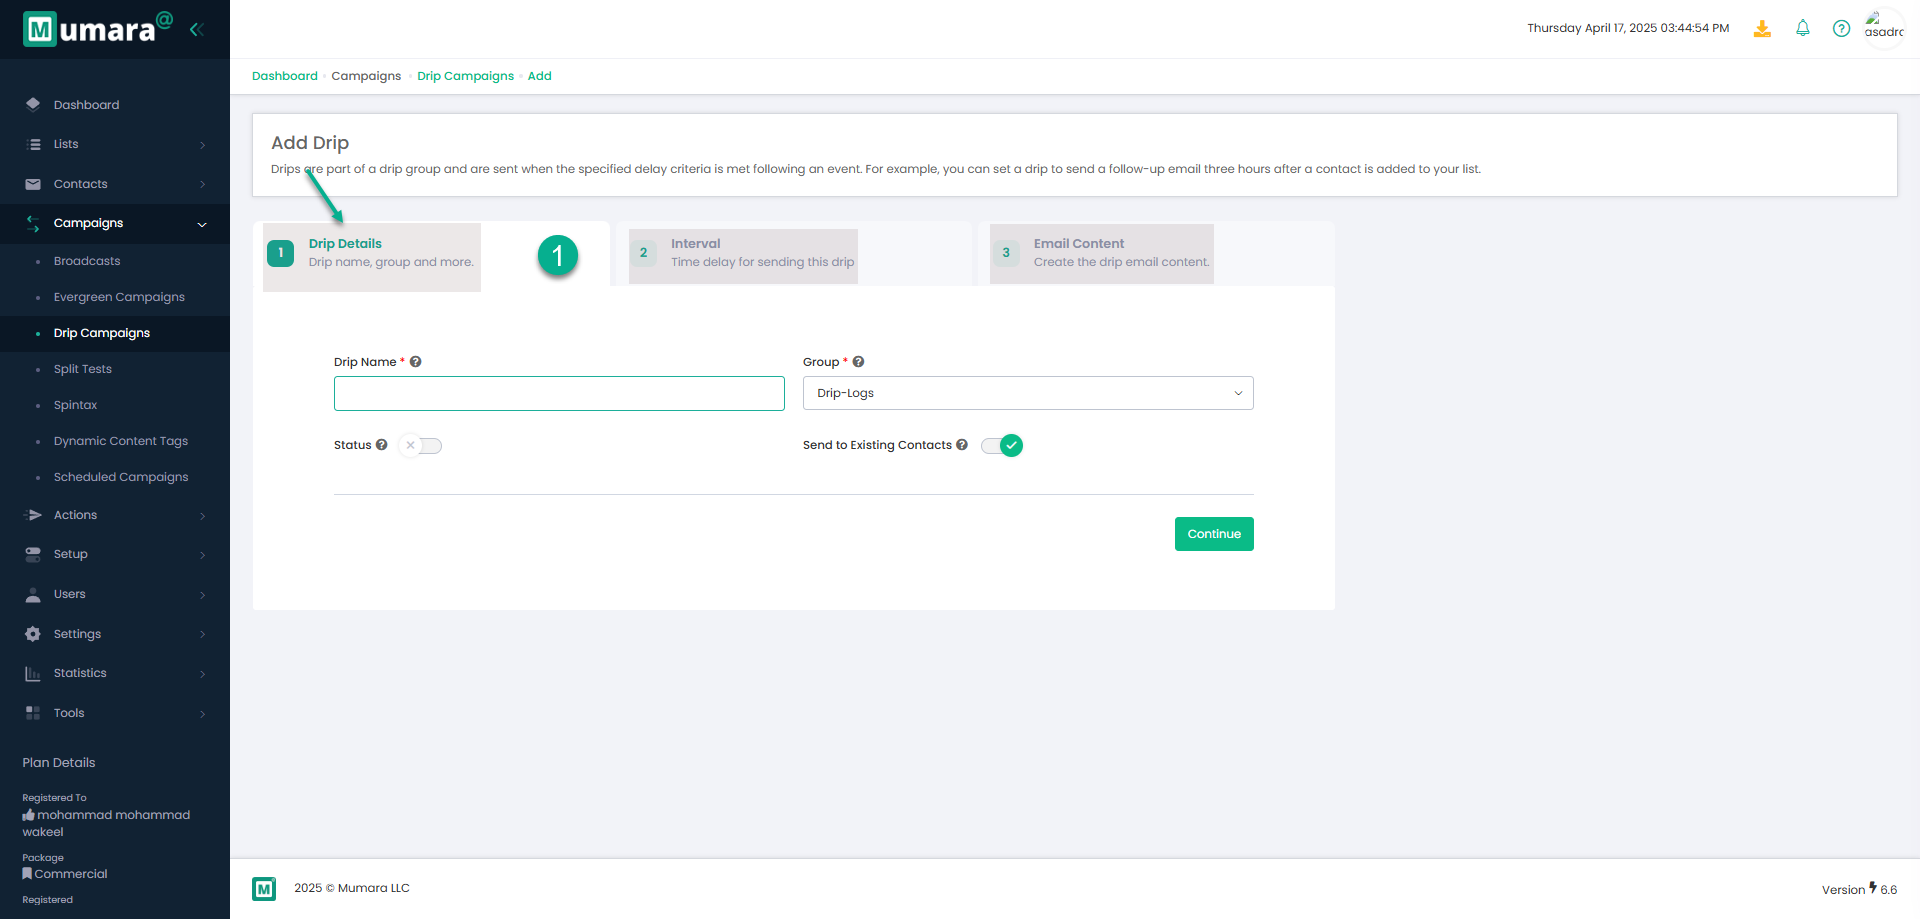
Fields on this TAB
Fileds | Types | Details |
Drip name * | Text Type | Enter the name of your drip campaign. This is required. |
Group * | Drop-down | Choose a group from the list to link this drip campaign to. This is required. |
Status | Toggle-button | Turn this on if you want the drip campaign to be active. Turn it off to deactivate. |
Send to Existing Contacts | Toggle-button | Send this drip to the existing pre-qualified contacts during the next trigger execution. This switch will automatically turn off after the execution. |
2. Interval
In this step, the user has to select the execution time of the Drip campaign.
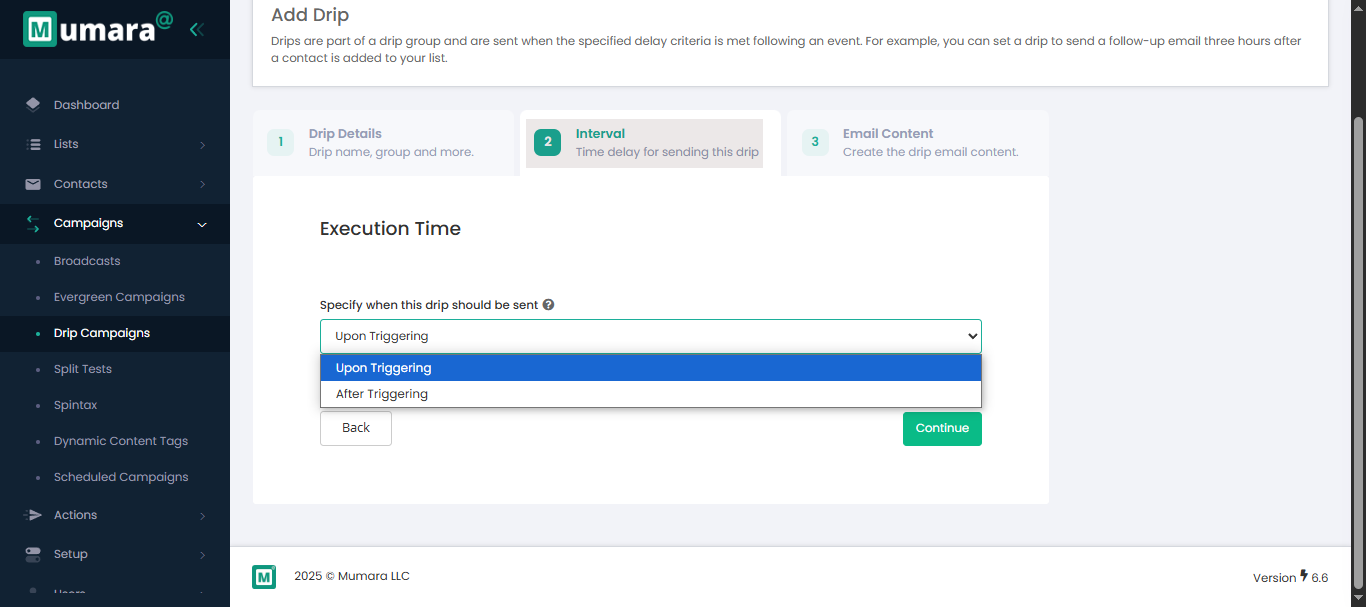
Fields on this TAB
Fileds | Types | Details |
Specify when this drip should be sent | drop-down | Upon Triggering: The drip will be queued for sending immediately after the trigger event occurs. After Triggering: The drip will be sent after the specified time delay is reached. |
In this step, the user has to design the email.

Fields on this TAB
Fileds | Types | Details |
Email Subject * | Text | Enter the subject line that will appear in your broadcast. |
Add Email Pre-header | Text emoji | Include a pre-header with your email to provide a preview next to or below the subject line in the recipient's inbox. |
HTML Content * | HTML Editor / Rich Text Editor | Write the main content of your email using HTML (text, links, images, etc). |
General variables | Drop-Down |
|
Recipient fields | Drop-Down |
|
Spintax | Drop-Down | Use Spintax to create dynamic content variations in your Broadcast by automatically rotating words |
Dynamic Content Tag | Drop-Down | Dynamic Content Tags allow you to personalize email campaigns by displaying specific content based on predefined criteria |
Profile variable | Drop-Down | Inserts personalized data from the recipient’s profile, such as first name, last name, or custom fields. |
Copy as text | Button | Copy the HTML content into the plain text version |
Text Content * | Text | Plain text version of your email, shown if the recipient’s email can’t display HTML |
Attachments | File Upload | Attach files like documents, images, PDFs, etc ,with your broadcast |
Sending the domain for preview | Drop-down | The preview email will be sent from the selected domain. |
Email address to send a test preview | Text | Enter the email address where you'd like to receive a test preview of this drip email. |
Viewing Drip campaigns
On this screen Drip camapigns groups will be displyed.
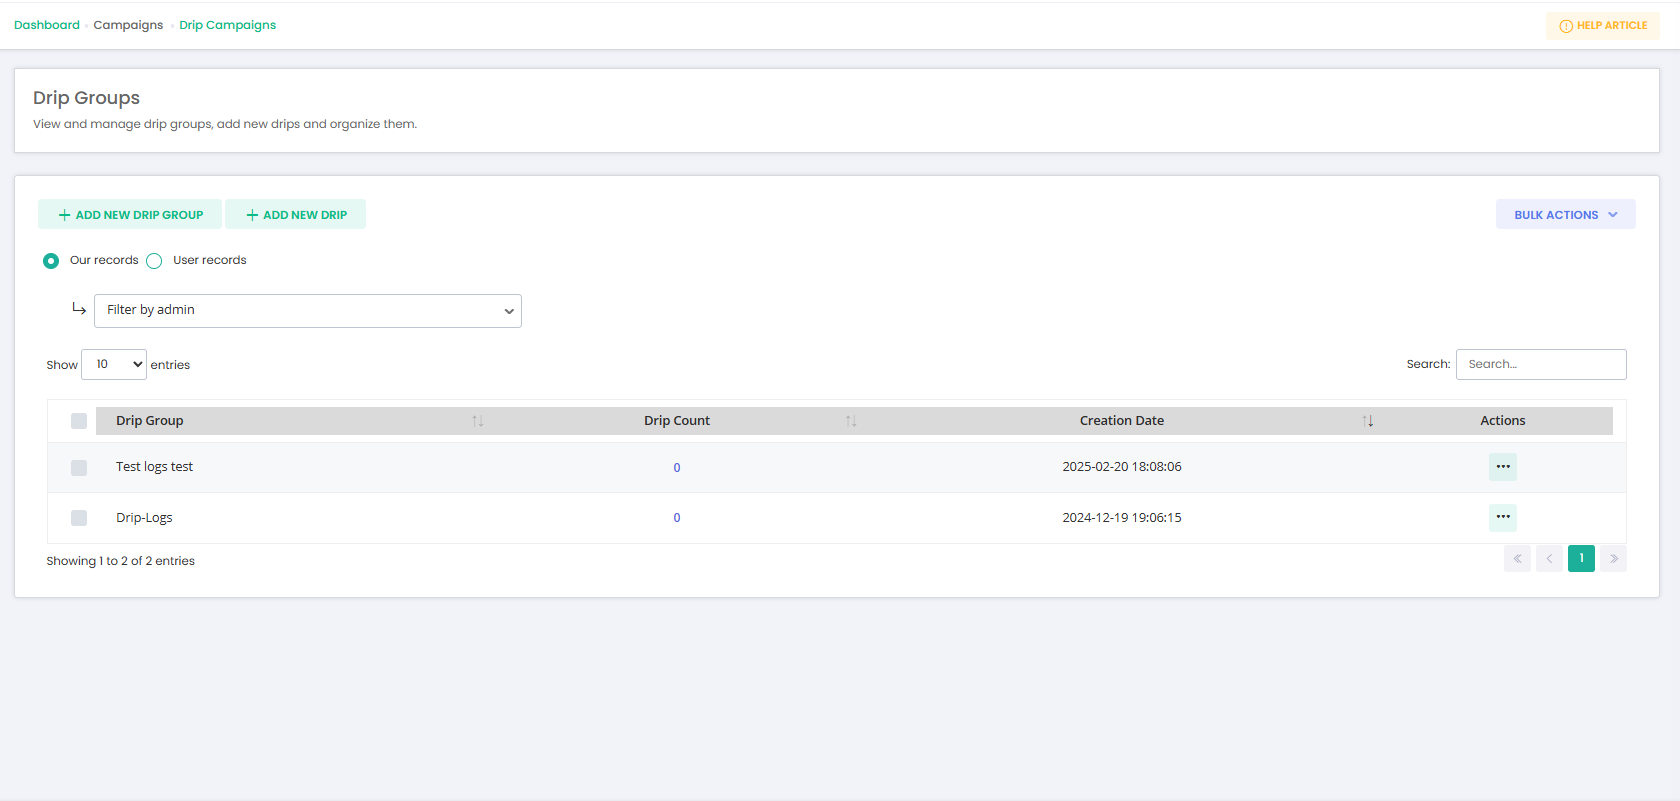
Fields on the this page
Fileds | Details |
Check box | Used to select multiple drip campaigns at once. |
Drip group | Displaying the name of the group. |
Drip Count | Counts of the drips are fired. |
Creation Date | Creation date of the drip group. |
Actions | View Drips: See all drips in the group. |
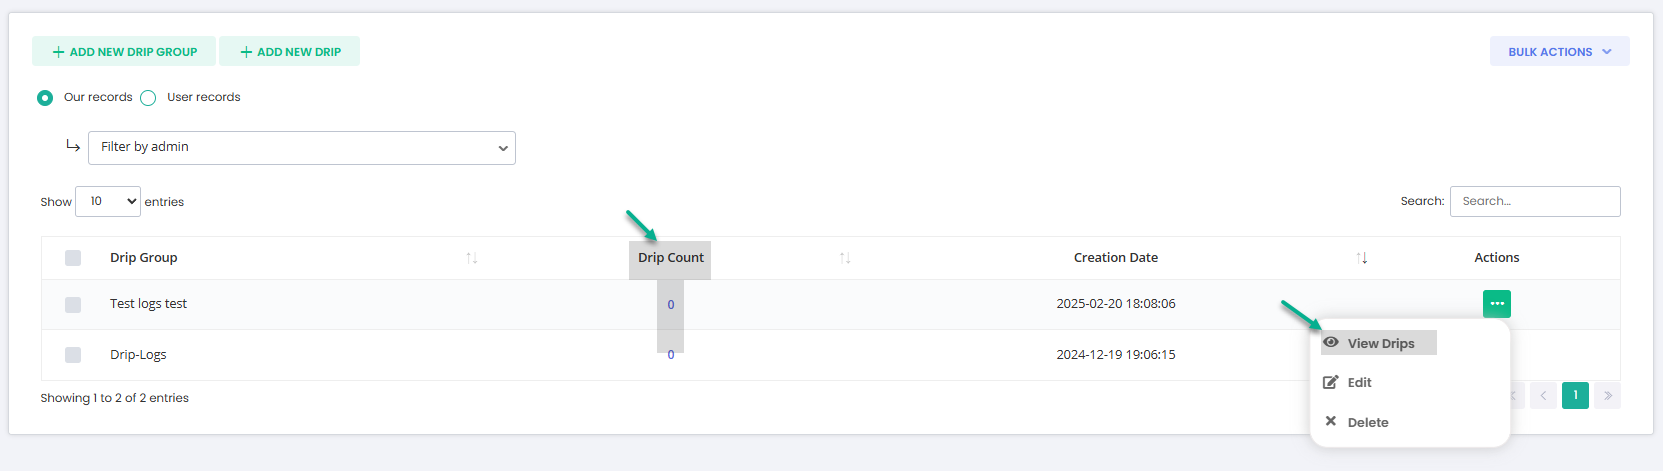
“View Drips” & Click on “Drips counts”
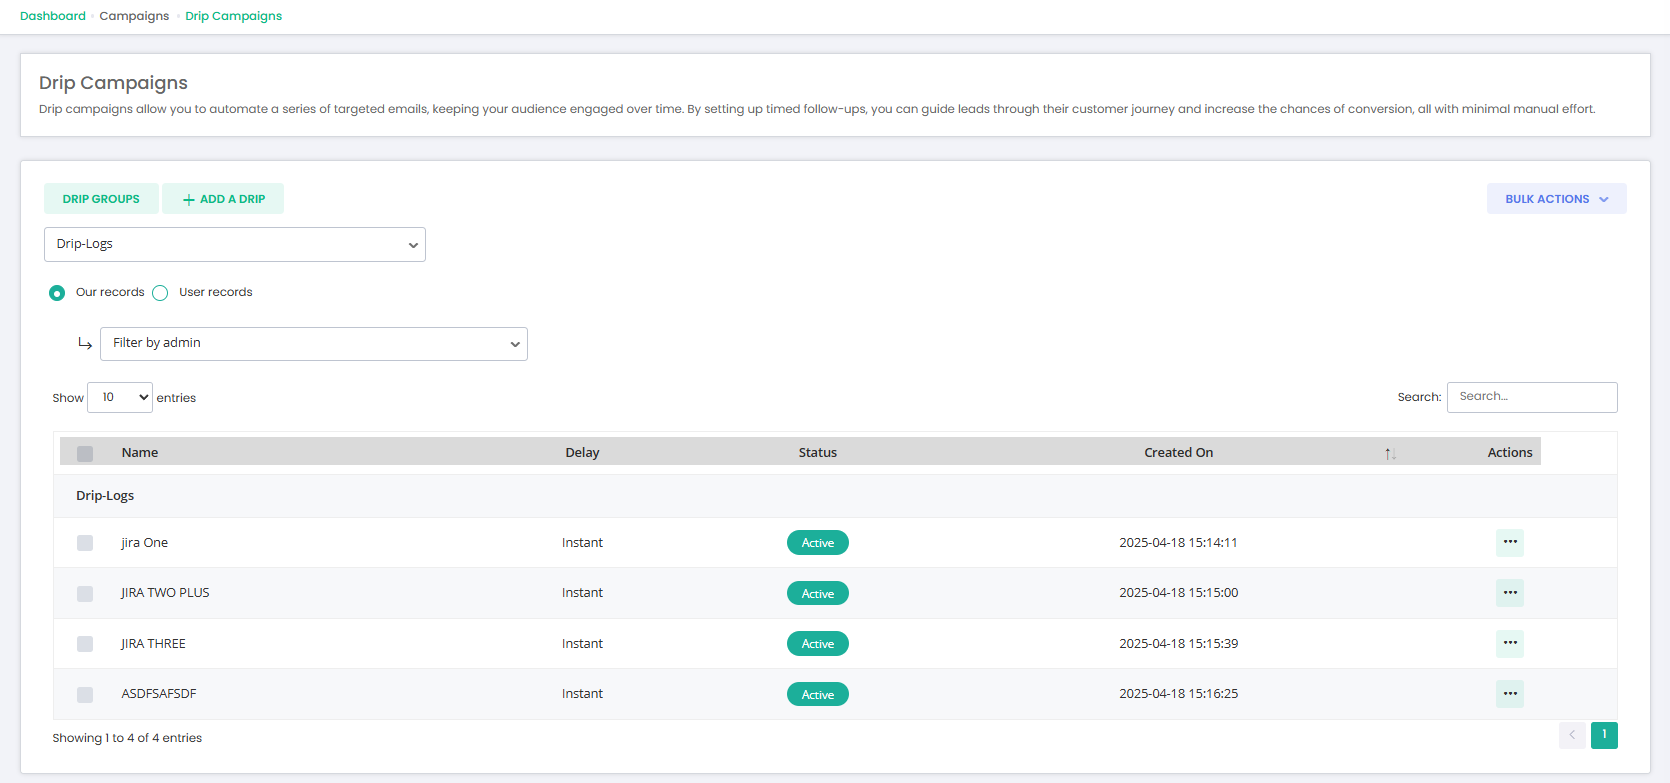
Fields on this page
Fileds | Details |
Name | The name of the drip campaign. |
Delay | The time delay after the event occurs before the drip is sent. |
Status | Shows whether the drip campaign is On (active) or Off (inactive). |
Created on | The date when the drip campaign was created. |
Actions | Edit: Make changes to the drip. |