Overview
Mumara enhances your ability to build and maintain a robust contact database. With its advanced data mapping and import capabilities, the platform ensures your contact lists are both comprehensive and effortlessly maintained. To add a contact, navigate to the Contacts section and select the Add a Contact option to manually input contact details into your desired list.
Form Fields
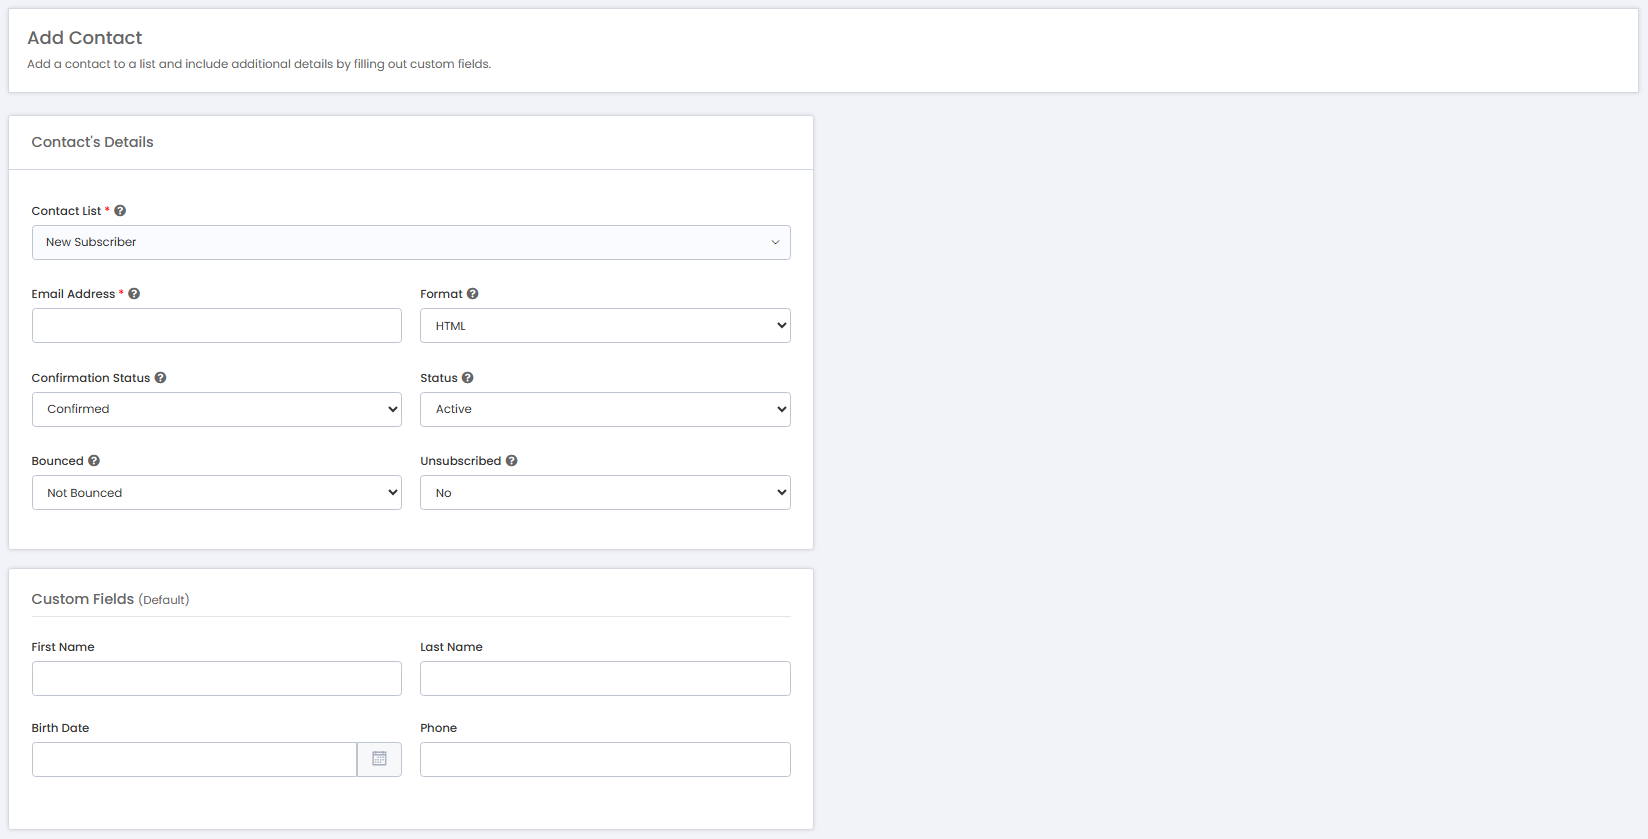
Contact List: Select from the dropdown menu the target list for your new contact. Custom fields linked to the selected list will automatically be presented for the additional details insertion.
Email Address: Enter the email address of the contact. This field is crucial as it serves as the primary identifier for the contact.
Format: Choose between “HTML” or “Text” format for the emails that the contact will receive, ensuring compatibility with the contact’s email client and preferences.
Confirmation Status: Designate whether the contact’s email address is “Confirmed” or “Unconfirmed”. Only contacts with a ‘Confirmed’ status will receive emails, unless a confirmation link is included in your email content.
Status: Toggle the contact’s status to ‘Inactive’ if you wish to temporarily halt email communication to this contact.
Bounced: Specify whether the contact’s email has been marked as ‘Bounced’. This is particularly useful when rectifying the status of a contact previously marked as ‘Bounced’ to ‘Not Bounced’.
Unsubscribed: Indicate if the contact has opted out of receiving communications. This feature is essential when updating the status of a contact from ‘Unsubscribed’ to ‘Subscribed’.
Additional Fields: Enter any other pertinent information in the additional fields that appear upon selecting a contact list. These fields allow for the capture of specialized data tailored to your contact management needs.
Save Buttons
Save & Add New
Commits the entered contact information to the selected list and prepares the form for the entry of another new contact.
Save & Exit
Saves the provided contact information and closes the form, redirecting you to the main contact list overview.
Cancel
Aborts the current entry, discarding any changes, and returns you to the previous screen without saving.
Aborts the current entry, discarding any changes, and returns you to the previous screen without saving.
Note: Fields marked with an asterisk (*) are required.
Mumara simplifies the task of importing contacts by offering a straightforward and fast process to incorporate bulk contacts from a CSV file into your application. This guide will assist you in navigating the import process, ensuring that your contacts are swiftly and correctly imported into the application.
Important Considerations for Importing Contacts
Before initiating the import process, there are several critical factors to consider to ensure a smooth and successful import:
File Size Limit: The size of the CSV file you are uploading must not exceed the upload_max_filesize limit specified in your server’s php.ini file. If your file is larger, you may need to increase this limit or split your file into smaller chunks.
File Size Limit: The size of the CSV file you are uploading must not exceed the upload_max_filesize limit specified in your server’s php.ini file. If your file is larger, you may need to increase this limit or split your file into smaller chunks.
Supported File Extensions: Ensure that the file extension of your CSV or TXT file is supported by Mumara.
Import Triggered by Cron: The import process begins when the cron job executes. There’s no need for concern if the import doesn’t start immediately after you’ve initiated it; the cron schedule will trigger the process.
Server-Side Import Processing: After starting the import, you have the freedom to navigate away from the page or even close it. The import procedure runs in the background on the server, so your presence on the page is not required for it to continue.
By keeping these points in mind, you can ensure that your contact import to Mumara is executed effectively and without any unexpected issues.
Step 1: File Source Selection
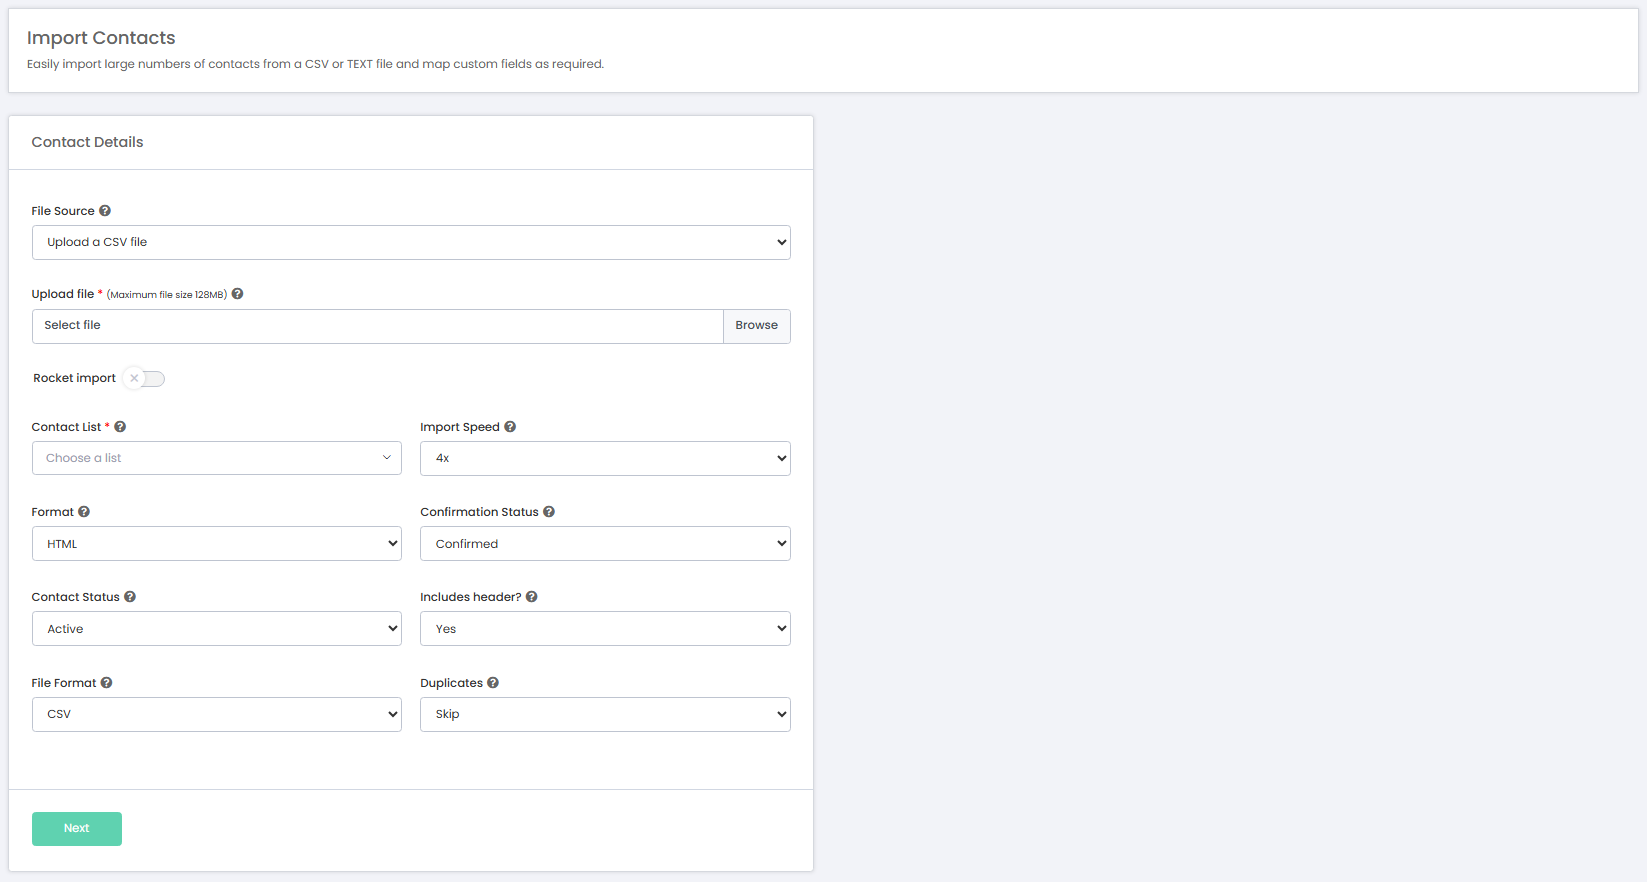
Begin by specifying the source of your CSV file
Upload a File: Choose this option to upload a file directly from your computer.
Select a File from Server: Use this option to select a pre-uploaded file from your server.
Step 2: Import Configuration
Configure your import settings for optimal integration
Normal Import: Speed up the import process by up to 4x with multiple threads.
Rocket Import: Utilize the ‘Rocket Import’ feature to increase the import speed.
Contact List: Select the target list where your imported contacts will reside.
Format: Choose between “HTML” or “Text” format for the emails that the contact will receive, ensuring compatibility with the contact’s email client and preferences.
Confirmation Status: Set the email confirmation status (Confirmed/Unconfirmed).
Contact Status: Decide the initial status of your contacts (Active/Inactive).
Header Included?: Indicate if your CSV includes headers, so the first line will be skipped during import.
File Format: Select the file format. Usually CSV.
Duplicates: Determine the action for duplicate entries (Skip, Overwrite, Update).

Accurately map your CSV columns to the relevant fields in Mumara:

Email (Required): Link the ‘Email’ column to the email field in Mumara.
Any Other Field (Optional): Whatever fields were assigned to this contact list should become visible here for the CSV file header mapping.
Override Creation Date: Choose to override the creation date for the contacts if necessary. In some cases, you may need to override the creation date of the contacts that you are importing to match with your specific database. It is useful when you have triggers and drips running based on the contact’s creation date.
Field Types for Data Mapping in Mumara:
When importing contacts into Mumara, it’s crucial to understand the different field types to ensure accurate data mapping. Here is a description of each field type available:
Country: Mumara can recognize country codes and map them to their full names. For example, ‘US’ will be mapped to ‘United States’, ‘PK’ to ‘Pakistan’, ‘FR’ to ‘France’, and so on.
Text: Any alphanumeric or special character data is accepted in this field. It’s versatile and can include a wide range of textual information.
Numeric: This field is strictly for numerical values. Ensure that the data contains numbers only (integers or decimals).
Checkboxes: Utilize this field when you have multiple options available, and more than one can be selected for a single contact, separated by a comma, e.g, black, brown, white.
Radio Options: This is for fields where only one option can be selected from a list of preset values. It’s similar to checkboxes but limited to a single choice.
Dropdown: Use this for a list of pre-entered options where one can be selected from a dropdown menu.
Multiline: This field is suitable for data that spans multiple lines, such as addresses or any other information that requires more space.
Date: The date field accepts only date-formatted data. You will need to map it with the correct date format as it appears in your CSV file to ensure proper importation.
JSON: For more complex data segmentation needs, this field can store JSON strings, allowing for a structured and detailed data representation.
Note: It’s important to align the data in your CSV file with the corresponding field type to ensure the integrity of your contact database post-import.

Proceed with the import process:
Click ‘Next’ to start importing your contacts.
Monitor the progress with the displayed import completion percentage.
Upon completion, a summary will show the total contacts, number of successful imports, duplicates, and invalid entries.
After the import is finalized:

Access and review the lists of duplicates or invalid contacts if provided.
Select ‘View Contacts’ to examine the imported contacts in your list.
Note: Accuracy in your CSV file preparation and field mapping is critical to a successful import process.